Difference between revisions of "Using RocketLauncher over UNC"
Jump to navigation
Jump to search
m |
m |
||
| Line 11: | Line 11: | ||
Here is how to resolve these problems: | Here is how to resolve these problems: | ||
| − | #Download the .NET Framework 2.0 Configuration Tool from the link at the bottom of this page - | + | #Download the .NET Framework 2.0 Configuration Tool from the link at the bottom of this page - [http://blogs.msdn.com/b/astebner/archive/2006/01/23/516671.aspx]. Normally you'd have to download/install the SDK to get this tool, but this guy stripped it out and created a separate installer for it. Props to him! If it's down, PM me and I'll send you a copy. |
| − | #Once installed, run "Microsoft .NET Framework 2.0 Configuration" from Control Panel -> Administrative Tools | + | #Once installed, run "''Microsoft .NET Framework 2.0 Configuration''" from Control Panel -> Administrative Tools |
#Create a new Code Group | #Create a new Code Group | ||
##Expand My Computer -> Runtime Security Policy -> Machine -> Code Groups | ##Expand My Computer -> Runtime Security Policy -> Machine -> Code Groups | ||
Revision as of 22:47, 21 August 2014
Resolving security errors when calling Keymapper from HyperLaunch over a UNC path
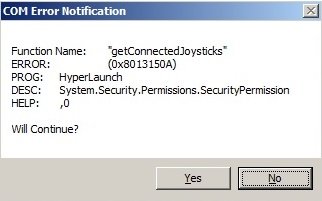
Running HyperSpin/HyperLaunch over a UNC path basically works perfectly fine, but when using a keymapper with HyperLaunch in this scenario, Windows security measures cause the application to crash and produce the following error message:

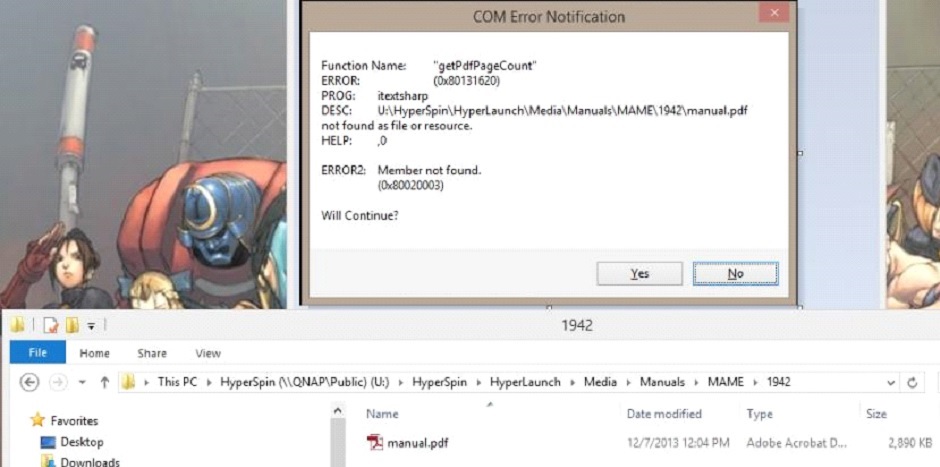
The same goes for HyperPause’s manual/guide function. An error is shown when trying to open a pdf file from a UNC installation:

Here is how to resolve these problems:
- Download the .NET Framework 2.0 Configuration Tool from the link at the bottom of this page - [1]. Normally you'd have to download/install the SDK to get this tool, but this guy stripped it out and created a separate installer for it. Props to him! If it's down, PM me and I'll send you a copy.
- Once installed, run "Microsoft .NET Framework 2.0 Configuration" from Control Panel -> Administrative Tools
- Create a new Code Group
- Expand My Computer -> Runtime Security Policy -> Machine -> Code Groups
- Right-click on "All_Code" and select "New..."
- Give it a name under "Create a new code group" (I just used "HyperLaunchCodeGroup") and then click "Next"
- Under "Choose the condition type for this code group" select "URL" and then type in the full UNC path to the "HyperLaunch.dll" file, which is located in the \HyperLaunch\Module Extensions" folder. For example, my ##;server name is "SERVER", the FQDN is "SERVER.home.mydomain.com", and it's located in the "Users$" share. So, the full UNC path that I used is:
- file:\\SERVER.home.mydomain.com\Users$\HTPC\HyperSpin\HyperLaunch\Module%20Extensions\HyperLaunch.dll
- (Note that this is a URL so if you have spaces in the path you'll want to replace them with the HTML character code for a space which is "%20" without the quotes.) Then click "Next"
- Under "Use existing permission set:" select ”FullTrust”, then click "Next"
- Click "Finish"
- Note that it will actually create the Code Group with "Copy of" pre-pended to the name you entered. So, if you're OCD like me and want to change it back to the name you entered, you can right-click and rename it
- Create another Code Group, this time for itextsharp.dll (a library used by HyperPause to open pdf files).
- Proceed the same steps as above. Give it a new name, e.g. “HyperPauseCodeGroup” In my case, the corresponding UNC path looks like:
- file:\\SERVER.home.mydomain.com\Users$\HTPC\HyperSpin\HyperLaunch\Module%20Extensions\itextsharp.dll
- Proceed the same steps as above. Give it a new name, e.g. “HyperPauseCodeGroup” In my case, the corresponding UNC path looks like:
OPTIONAL/RECOMMENDED
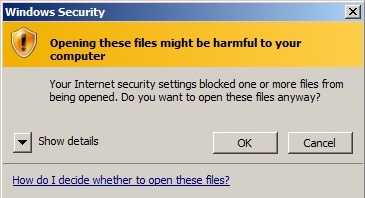
Since you'll be running your applications from a UNC path, you'll probably run into the error message shown below. In order to get rid of these security warnings, you have to add your NAS/Server name to the proper security zone in Internet Explorer.

Add your NAS/Server to the "Local Intranet" security zone
- Open Control Panel -> Internet Options
- Click on the "Security" tab
- Select "Local Intranet" and then click on the "Sites" button
- Click the "Advanced" button
- Add your NAS/Server here. (For example, the FQDN for my server is "SERVER.home.mydomain.com", so I entered "SERVER.home.mydomain.com" here without quotes)
- Click "Close" -> "OK" -> "OK"